
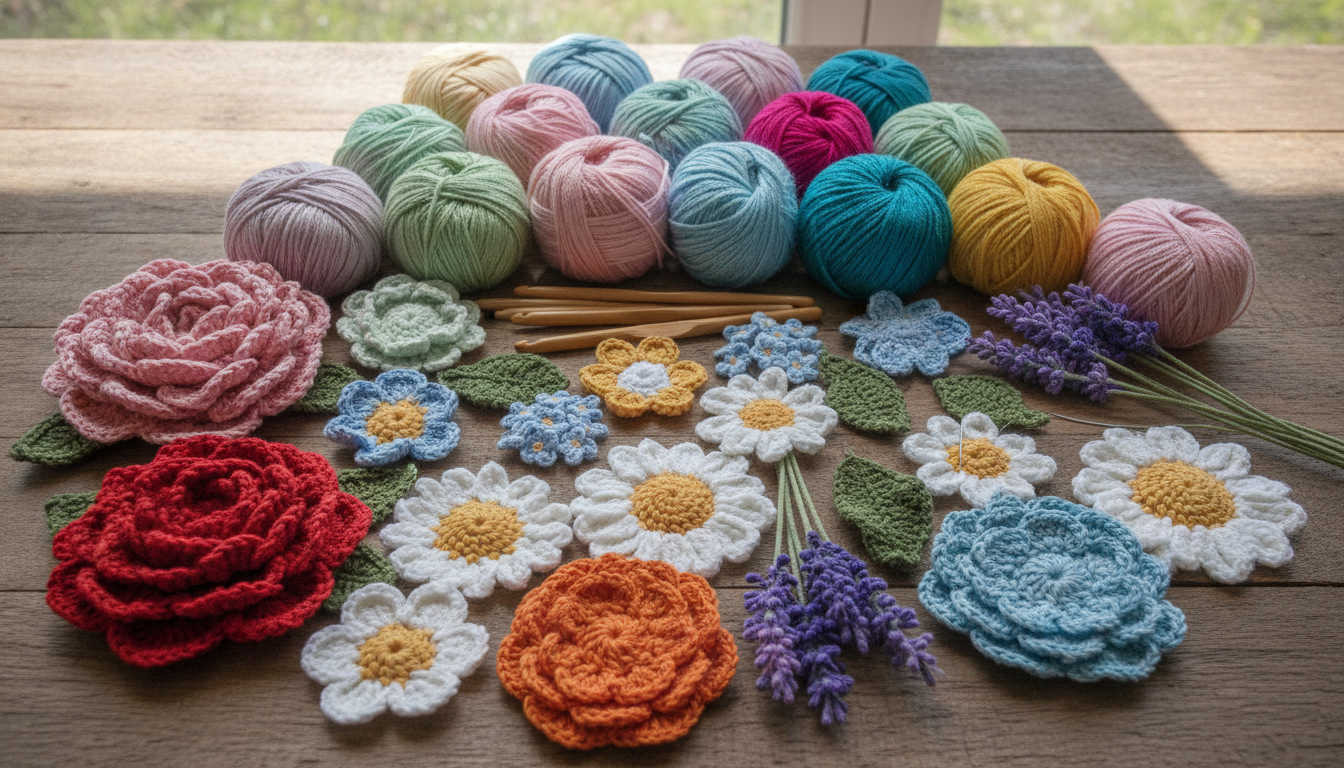
Welcome to our curated collection of beautiful botanical designs. Whether Whether you want to make simple flowers, elegant roses, or colorful daisies, these free crochet flower patterns are easy to follow , these 9 free crochet flower patterns offer something special for every crafter. You will discover everything from simple, flat blooms to intricate, dimensional petals that bring life to any project.
Thank you for reading this post, don't forget to subscribe!These designs are perfect for adding a handmade touch to your home decor or creating thoughtful gifts for friends. We have organized this list to help you find the right level of challenge, starting with easy crochet flower patterns that work up in minutes. As you gain confidence, you can move on to more textured, advanced styles.
Before you begin, take a moment to look through your yarn stash and check your hook sizes. Choosing the right materials will make your crafting experience much more enjoyable. Pick a project that matches your current skill level and get ready to bloom with creativity today.
Table of Contents
Free Crochet Flower Patterns: Materials, Stitches, and Reading Tips
Every great project begins with selecting the perfect yarn and understanding your pattern. When you explore free crochet flower patterns, you will find that the material you choose changes the final look of your work.
How cotton, acrylic, and scrap yarn affect shape and texture
Cotton yarn is a favorite for flowers because it holds its shape well and offers a crisp, defined texture. Acrylic yarn is softer and more flexible, which creates a relaxed, flowing appearance for your petals.
Do not be afraid to use scrap yarn from your stash for these small projects. Mixing different fibers can add unique character to your handmade bouquets.
Matching yarn weight with the recommended crochet hook
Always check the yarn label to find the suggested hook size. Using a hook that is slightly smaller than recommended will create tighter stitches, which helps your flower petals stand up straight.
Working chains, slip stitches, single crochet, and double crochet
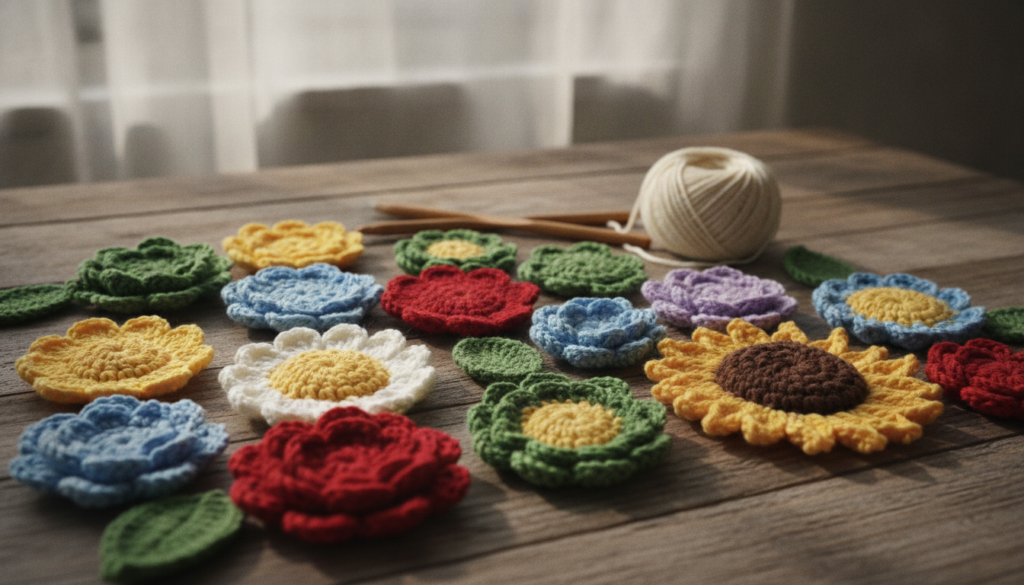
Most floral designs rely on a few fundamental stitches. You will frequently use chains to create loops and slip stitches to join your rounds together.
Single crochet stitches provide a dense base, while double crochet stitches add height to your petals. Mastering these four techniques will allow you to complete almost any design.
Recognizing increases, decreases, loops, and repeated rounds
Patterns often use increases to make petals wider and decreases to shape the edges. You will also learn to work into specific loops to create depth and texture.
Many designs involve repeating the same round several times. Keeping track of these repetitions ensures your flower looks symmetrical and professional.
How to check gauge when size and structure matter
Gauge is simply the number of stitches per inch. If your flower needs to fit a specific stem or hair clip, check your gauge before you start.
Even a small change in tension can alter the final size of your project. Adjust your hook size if your test piece is too large or too small.
Where to find a crochet flower PDF or crochet flower video tutorial
If you are a visual learner, you might prefer a crochet flower video tutorial to see exactly how the yarn moves. These guides are excellent for watching complex petal formations in real-time.
Alternatively, a crochet flower PDF is perfect for those who like to print their instructions and keep them nearby. You can find many high-quality crochet flower tutorials online to help you build your skills.
Simple Five-Petal Crochet Flower
Simple center, short rounds, and easy petal shaping
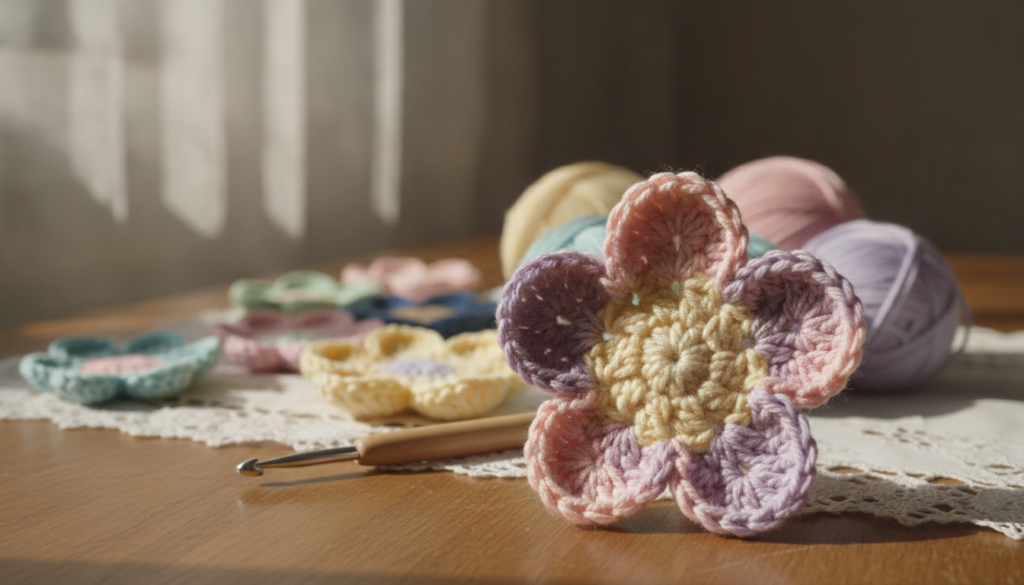
Discover how quick and fun it is to whip up a classic five-petal crochet flower in just a few minutes. These easy crochet flower patterns serve as an approachable starting point for anyone new to the craft. By focusing on a simple center and short rounds, you can achieve beautiful results without feeling overwhelmed.
Recommended yarn colors and hook size for a small flower
For a delicate look, choose a lightweight cotton yarn in bright, cheerful colors like sunny yellow or soft pink. A size E (3.5mm) or F (3.75mm) crochet hook works best for these small projects. Using a smaller hook ensures your stitches remain tight and the petals hold their shape perfectly.
Creating the adjustable center and first round
Start your project with an adjustable ring, often called a magic circle, to keep the center neat. Follow these crochet flower instructions by working your first round of stitches directly into the ring. This technique allows you to pull the yarn tail tight, closing the center completely for a professional finish.
Forming evenly spaced petals and fastening off neatly
To create the petals, work a series of chain stitches and double crochets into the base round. Following a crochet flower step by step approach helps ensure each of the five petals is evenly spaced. Once you finish the final petal, cut your yarn and pull it through the last loop to secure your work.
Adding it to headbands, cards, gift wrap, and hair clips
These versatile blooms are perfect for adding a handmade touch to your daily accessories. You can easily glue them onto hair clips or sew them onto headbands for a custom style. They also make lovely embellishments for greeting cards or as a unique topper for gift wrap.
Making a matching set with multiple color combinations
Why stop at just one? You can create a coordinated set by repeating the pattern in various color combinations. Mixing and matching your yarn colors allows you to produce a vibrant collection that suits any season or occasion.
Classic Layered Crochet Rose
Using a long spiral strip to create naturally curled petals
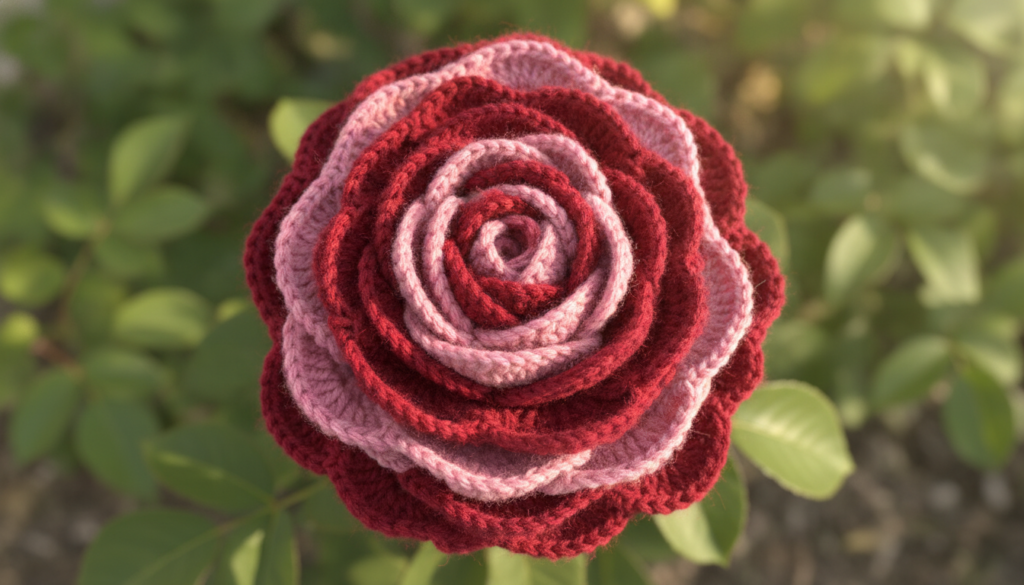
If you want to master beautiful crochet flower designs, the layered rose is a perfect starting point. This technique relies on a long, flat strip of crochet that naturally curls when you work it correctly. By building the length of the strip, you create the foundation for a lush, blooming flower.
Selecting yarn that holds the rose shape without becoming stiff
Choosing the right yarn is essential for a professional finish. You want a fiber that offers enough structure to hold the rose shape without becoming too stiff or rigid. A soft cotton or a high-quality acrylic blend usually provides the best balance between shape retention and a soft, natural drape.
Working the petal strip with increases and textured stitches
To achieve the look of real petals, you must follow a crochet flower step by step guide that incorporates increases. By adding multiple stitches into each base chain, the strip begins to ruffle and expand. Adding textured stitches like picots or shell patterns along the edge further enhances the realistic appearance of the petals.
Rolling, stitching, and securing the flower from the center outward
Once your strip is complete, the assembly process brings the rose to life. Start by rolling the strip tightly from the center outward to form the bud. Use a tapestry needle and matching yarn to secure the base, ensuring every layer stays firmly in place.
Decorating hats, scarves, wreaths, and handmade bouquets
These roses are incredibly versatile additions to your craft collection. You can easily attach them to hats, scarves, or seasonal wreaths for a touch of handmade charm. They also serve as the perfect focal point for a custom, dimensional handmade bouquet.
Combining small and large roses for a dimensional arrangement
For a truly professional look, try mixing different sizes of roses in your projects. Combining small, tight buds with larger, fully opened blooms creates a beautiful sense of depth. Following this crochet flower step by step approach allows you to create stunning, professional-grade floral arrangements for any occasion.
Fast Two-Round Crochet Flower
A practical choice for beginners, classroom projects, and scrap yarn
Beginners often look for easy crochet flower patterns that yield fast results. This two-round design is perfect for those just starting their crafting journey. It also serves as an excellent activity for classroom settings or a great way to use up leftover scrap yarn.
How the compact construction keeps the flower quick to repeat
The beauty of this design lies in its efficiency. Because it only requires two rounds, you can produce a large batch of flowers in a single sitting. This makes it a favorite for anyone needing a high volume of decorations in a short amount of time.
Joining the starting chain into a ring
To begin, you will create a small foundation by joining your starting chain into a ring with a slip stitch. This creates a sturdy center for your petals to grow from. Following these clear crochet flower instructions ensures your base remains neat and secure.
Building the petals with simple loops and slip stitches
Once your ring is ready, you will build the petals using simple loops and slip stitches. This repetitive motion is easy to memorize and keeps the work moving quickly. You will find that the petals form naturally as you work around the center ring.
Using quick flowers for bookmarks, magnets, and gift tags
These small blooms are incredibly versatile for various DIY projects. You can easily attach them to paperclips to create charming bookmarks. They also look wonderful when glued onto magnets or tied onto gift tags for a personalized touch.
Stitching several flowers together for a colorful garland
If you want to make a larger statement, try stitching several flowers together. By connecting them with a simple chain, you can create a beautiful, colorful garland. These easy crochet flower patterns provide endless opportunities to brighten up your home decor.
Textured Sunflower Crochet Motif
Sunflowers bring a touch of warmth to any room with their vibrant colors and bold shapes. These projects are among the most popular free crochet flower patterns for crafters who love nature-inspired decor.
Choosing brown, gold, and yellow yarn for a recognizable sunflower
To achieve a realistic look, start by selecting high-quality yarn in deep brown, golden yellow, and bright yellow. The brown center mimics the seeds, while the two shades of yellow create depth in the petals. Using a consistent yarn weight ensures your sunflower looks balanced and professional.
Creating texture with front-loop stitches and layered rounds
Texture is the secret to making your sunflower stand out. By working into the front loops only, you create ridges that add dimension to the flower head. Layering your rounds allows the petals to overlap naturally, giving the motif a lifelike appearance.
Managing stitch counts around the center
Precision is vital when working the center of your sunflower. Keep a close eye on your stitch counts during the first few rounds to ensure the base remains flat. If the center curls too much, your petals will not lay correctly.
Blocking curled petals into a smooth decorative shape
Once your flower is complete, you might notice the petals curling at the edges. Blocking is a simple technique that helps relax the fibers and smooth out the shape. Simply dampen the motif and pin it flat until it dries completely.
Adding motifs to table runners, baskets, and fall wreaths
These versatile motifs work beautifully on various home items. You can sew them onto a rustic table runner or attach them to a woven basket for a seasonal touch. They also make excellent additions to fall wreaths, adding a pop of color to your front door.
Turning the flower into a reusable centerpiece accent
If you want a lasting decoration, consider stiffening your finished sunflower. These crochet flower designs can serve as reusable centerpiece accents for your dining table. They offer a charming, handmade aesthetic that you can enjoy year after year.
Delicate Crochet Daisy
Few crochet flower designs capture the essence of spring like a classic daisy. These motifs are popular because they work up quickly and look beautiful on almost any surface.
Using white petals with a yellow center for a traditional look
The most iconic version of this flower features crisp white petals surrounding a bright yellow center. This classic color combination mimics the natural appearance of daisies found in meadows.
Substituting pastel colors for spring and nursery projects
If you prefer a softer aesthetic, try using pastel yarns instead of traditional white. Soft pinks, baby blues, or mint greens work perfectly for nursery decor or spring-themed accessories.
Achieving a professional look requires careful attention to your stitch placement. Ensure you count your stitches in each round to keep the petals spaced evenly for a perfectly balanced outline.
Keeping loose ends hidden on the back of the motif
Once you finish your flower, you will have a few yarn tails to manage. Always weave these ends securely into the back of the motif to keep the front looking clean and polished.
Attaching daisies to bags, denim jackets, and summer hats
These flowers are incredibly versatile for personalizing your wardrobe. You can easily sew them onto canvas bags, denim jackets, or summer hats to add a unique, handmade flair to your style.
Arranging several flowers into a cheerful wall hanging
For a larger project, consider grouping multiple daisies together. Arranging them on a wooden hoop or a piece of twine creates a cheerful wall hanging that brightens any room in your home.
Mastering these easy crochet flower patterns allows you to experiment with different sizes and yarn weights. Have fun creating your own garden of handmade blooms.
Layered Hibiscus Crochet Flower
If you love bold, exotic blooms, the layered hibiscus is a perfect addition to your collection of crochet flower designs. This project captures the essence of summer with its striking silhouette and vibrant personality.
Combining broad petals, a contrasting center, and a long stamen
The beauty of the hibiscus lies in its unique anatomy. By combining broad, rounded petals with a deep, contrasting center, you create a realistic look. Adding a long, slender stamen reaching out from the middle completes the iconic tropical appearance.
Using color changes to emphasize the tropical flower shape
Strategic color changes help define the structure of your flower. Use bright, saturated yarns for the petals and a darker shade for the center to make the bloom pop. This simple technique highlights the natural curves of the hibiscus.
Working each petal separately or building petals in joined rounds
You have two main ways to construct these petals. Working each petal separately allows for more intricate detail and individual shaping. Alternatively, building petals in joined rounds is faster and creates a more cohesive base for your project.
Adding gentle shaping so the bloom looks open rather than flat
To keep your flower from looking flat, focus on gentle shaping during the final rounds. Increasing stitches strategically helps the petals curl outward naturally. This creates a three-dimensional effect that mimics a fresh, open blossom.
Using it on beach bags, hair accessories, and tropical party decor
These flowers are incredibly versatile for various projects. They look fantastic attached to straw beach bags or pinned onto hair accessories for a summer vibe. You can even use them as festive accents for tropical party decor.
Pairing large hibiscus flowers with smaller coordinating blooms
When you explore various free crochet flower patterns, try mixing sizes for a professional look. Pair your large, statement hibiscus with smaller, delicate buds to create a balanced arrangement. This combination adds depth and visual interest to any of your crochet flower designs.
Crochet Sunflower With a Popcorn Center
If you want to master a crochet flower step by step, this sunflower pattern is a perfect starting point. The secret to a realistic look lies in the center, which mimics the natural seed head of the plant.
Creating a raised center that resembles sunflower seeds
The popcorn stitch is ideal for creating a bumpy, raised surface. By clustering several double crochet stitches into one space, you achieve a dense texture that looks just like sunflower seeds.
Balancing textured stitches with smooth outer petals
While the center is busy and textured, the outer petals should remain smooth. This contrast helps define the flower’s outline and makes the center pop visually.
Blending mustard, golden yellow, and orange yarn
To capture the essence of a real sunflower, try blending warm tones. Start with a deep mustard for the center, then transition to golden yellow and bright orange for the petals.
Changing colors cleanly between the center and petal rounds
Clean transitions are vital for professional-looking crochet flower designs. Always fasten off your center color securely before joining the new yarn for the petals to avoid messy gaps.
Securing the center before attaching the flower to fabric
Before you finish, weave in all your yarn ends on the back of the motif. This ensures the center stays firm and prevents the stitches from unraveling over time.
Using the finished motif on tote bags, pillows, and kitchen towels
Once your sunflower is complete, it serves as a beautiful embellishment. You can follow this crochet flower step by step guide to decorate plain tote bags, cozy pillows, or even simple kitchen towels for a rustic touch.
Three-Dimensional Crochet Carnation
If you want to add depth to your crochet flower designs, the carnation is a perfect choice. This project stands out because it mimics the ruffled, dense petals of a real bloom through clever construction.
Working repeated increases to create a full, gathered edge
The secret to a realistic carnation lies in the use of repeated increases. By working multiple stitches into each base stitch, you create a ruffled, gathered edge that gives the flower its signature volume.
Selecting soft yarn for a flower with natural drape
Choosing the right material is essential for success. Using a soft, lightweight yarn ensures the petals maintain a natural drape rather than standing up too stiffly. This softness allows the layers to fold and overlap beautifully.
Stacking petal rounds from smallest to largest
Many crochet flower tutorials suggest building the flower in separate rounds. You should start with smaller petals at the center and stack larger rounds toward the outside to create a realistic, tapered depth.
Stitching the layers securely without flattening the flower
When assembling your pieces, use a tapestry needle to join the layers at the base. Be careful to stitch them securely without pulling too tight, as this prevents the petals from flattening out and losing their 3D shape.
Adding carnations to bouquets, brooches, and decorative baskets
These versatile flowers are perfect for various projects. You can attach them to pins for elegant brooches, group them into lush bouquets, or use them to embellish decorative baskets for your home.
Combining several shades for a realistic floral arrangement
To achieve a truly professional look, try combining several shades of yarn within a single flower or arrangement. Mixing soft pinks, whites, and deep reds adds visual interest and makes your crochet flower designs look incredibly lifelike.
Small Crochet Forget-Me-Not Flowers
Creating miniature flowers like forget-me-nots adds a charming touch to your handmade items. These tiny blossoms are versatile and fun to make using various crochet flower tutorials found online.
Choosing blue, white, or purple yarn for delicate petals
To capture the authentic look of these flowers, select soft yarn colors. Traditional shades of sky blue, crisp white, or soft purple work beautifully to create a delicate, realistic appearance.
Using a fine hook and tight tension for petite motifs
The secret to a perfect forget-me-not is its small scale. Use a fine crochet hook and maintain tight tension to ensure your petals remain dainty and well-defined.
Repeating the same short crochet flower instructions assembly-line style
Efficiency is key when you need a large batch of these flowers. By following the same short crochet flower instructions in an assembly-line fashion, you can complete several motifs in one sitting.
Organizing loose ends when making a large group of flowers
Working in batches often leaves you with many yarn tails to manage. Keep your workspace tidy by weaving in ends as you finish each flower rather than waiting until the very end.
Decorating baby blankets, greeting cards, and journal covers
These petite flowers are perfect for embellishing various projects. You might consult a crochet flower pdf to find creative ways to attach them to baby blankets, handmade greeting cards, or fabric journal covers.
Mixing forget-me-nots with leaves and larger crochet flower designs
For a professional finish, try layering your forget-me-nots with crochet leaves. Combining these small blooms with larger floral designs creates a beautiful, textured bouquet effect on any project.
Crochet Lavender Sprig
Bring the soothing scent of a garden indoors with these charming lavender designs. These projects are perfect for beginners and experts alike who enjoy creating unique crochet flower designs.
Combining a crocheted stem with compact buds
The secret to a realistic lavender sprig lies in the structure. You start by crocheting a sturdy yet flexible stem, then work your way up with compact, dense buds.
Choosing purple, lavender, green, and muted cream yarns
For the most natural look, select a palette of soft colors. Use shades of purple and lavender for the florets, paired with a muted green for the stem and leaves. A touch of cream can add depth to the buds.
Using small clusters to create the appearance of lavender florets
To mimic the look of real lavender, work your stitches in small, tight clusters. This technique creates the signature bumpy texture that defines the flower. It adds volume without making the piece feel heavy.
Adding narrow leaves that keep the sprig lightweight
Keep your leaves thin and delicate to maintain the overall balance of the sprig. Narrow, pointed leaves help the lavender look airy and graceful. This ensures the finished piece remains lightweight for various uses.
Arranging sprigs in a vase or fabric-wrapped bouquet
Once you have finished several sprigs, you can group them together. Place them in a small glass vase for a rustic centerpiece. Alternatively, tie them with twine to create a lovely fabric-wrapped bouquet.
Using them as package decorations, bookmarks, and table accents
These versatile flowers serve many purposes beyond simple decor. You can attach them to gift packages for a personal touch or use them as unique bookmarks. If you need extra help, a crochet flower video tutorial can guide you through the assembly process for these beautiful projects.
Finishing Techniques for Attractive Crochet Flower Designs
Giving your handmade projects a professional look requires attention to detail during the final steps. Following a proper crochet flower step by step process ensures your work stays durable and beautiful for years.
Securing tails on the back of flat motifs
For flat designs, turn your work over to the wrong side. Use a tapestry needle to weave the yarn tail through the base of the stitches in several directions. This prevents the end from unraveling while keeping the front side clean.
Hiding ends inside layered or three-dimensional flowers
When working with layered or 3D blooms, you have more space to conceal your yarn. Simply pull the tail through the center of the flower and weave it into the inner layers. This keeps the ends completely invisible from the outside.
Wet blocking cotton flowers into even petals
Wet blocking is essential for cotton yarn to achieve a crisp, uniform shape. Soak your finished piece in cool water, gently squeeze out the excess, and pin it onto a foam mat. Allow it to dry completely to set the stitches into perfect, even petals.
Using gentle shaping for curled, ruffled, or dimensional designs
If your pattern features ruffles or curls, avoid aggressive blocking. Instead, use your fingers to gently coax the petals into their desired position while the yarn is slightly damp. This maintains the natural bounce and texture of the design.
Choosing buttons, beads, embroidery, or crocheted centers safely
Adding a center piece provides a lovely focal point for your project. If you choose buttons or beads, ensure they are sewn on tightly with strong thread to prevent choking hazards. Alternatively, you can follow simple crochet flower instructions to create a matching yarn center for a soft, cohesive look.
Attaching brooch pins, clips, stems, and appliqué backing
To turn your flowers into accessories, sew a brooch pin or hair clip directly to the back. For stems, use floral wire wrapped in green yarn or florist tape. If you plan to use the flower as an appliqué, a small circle of felt glued or stitched to the back provides a sturdy base for attachment.
Ways to Use Handmade Crochet Flowers
Handmade blooms offer endless creative possibilities for your home and wardrobe. By utilizing various crochet flower designs, you can transform simple yarn projects into stunning accessories or thoughtful gifts,
Making pins, barrettes, headbands, necklaces, and hat decorations
You can easily attach your finished pieces to metal clips or hair ties to create unique barrettes. Sewing a small bloom onto a plain headband or a straw hat adds an instant touch of charm. For a personalized necklace, simply thread a delicate flower onto a cord or chain.
Choosing lightweight flowers for comfortable everyday wear
When creating wearable items, opt for thin yarn or cotton thread. Lightweight flowers are much more comfortable for everyday use because they do not weigh down your hair or clothing. These dainty pieces stay in place better and feel soft against your skin.
Adding flowers to baskets, blankets, pillows, and wall hangings
Larger motifs work beautifully as decorative accents for your home decor. You can stitch them onto the corners of blankets or scatter them across a throw pillow for a cozy look. Attaching these blooms to woven baskets or wall hangings adds a lovely, rustic texture to any room.
Using handmade blooms instead of disposable ribbon bows
Next time you wrap a gift, consider using a crochet flower instead of a store-bought ribbon. This eco-friendly choice adds a special, handmade touch that the recipient can reuse later. It turns every package into a memorable experience.
Creating bouquets, bookmarks, and personalized floral cards
You can combine several easy crochet flower patterns to create a lasting bouquet that never wilts. For book lovers, glue a flat bloom onto a ribbon to make a charming bookmark. You might also attach a small flower to the front of a card for a heartfelt, personalized greeting.
Packaging a collection of flowers as a beginner crochet kit
If you want to share your love for crafting, package a set of finished blooms as a gift. Include a few printed crochet flower tutorials to help the recipient learn how to make their own. This thoughtful collection serves as a perfect introduction for anyone interested in learning easy crochet flower patterns, For help choosing the right yarn weight, see the Craft Yarn Council’s Standard Yarn Weight System.
Conclusion
Begin your creative path by mastering easy crochet flower patterns like the simple daisy or a five-petal bloom. These foundational shapes build the confidence needed to tackle complex layered roses, textured sunflowers, or dimensional carnations.
You can create unique arrangements, wearable accessories, or thoughtful gifts by combining these designs. Explore our collection of free crochet flower patterns to find inspiration for your next handmade project.
Refer to our detailed crochet flower tutorials whenever you need extra support. These resources provide clear crochet flower instructions to guide your hook through every stitch. You might prefer a crochet flower step by step guide to visualize the process.
Download a handy crochet flower pdf to keep your favorite designs organized in one place. Many crafters find that a crochet flower video tutorial helps clarify tricky techniques during the assembly phase. Pick your yarn, grab your hook, and enjoy the process of bringing these beautiful blooms to life.